Geotagged Photo Application
The new CAP allows using a range of modern technologies when carrying out checks for area-based payments. Although area monitoring systems rely heavily on automated analysis of Earth observation data, they often use geotagged photos to support and complement the remote sensing methods when those do not provide conclusive results.
About the application
Geotagged Photo Application is an Android application that allows farmers to share their photos (geotagged or not) with the paying agency (PA). Since photos can be used as a proof of activity or to clarify the request, it's very important for PA to get as much information about the photo as possible, e.g. whether the photo, its location or date of creation have been changed. Photos that have been altered, uploaded from external sources or weren't geotagged will be marked differently, so that PA can take this into account in further decisions.
Short description of the process
The application is task oriented, and the typical usage comprises the following steps:
- tasks are created in advance by the PA using the Expert Judgement application or ad-hoc by the farmers themselves;
- before the field visit, the farmer synchronizes the data on their mobile device with the central database, storing base maps and any messages, tasks or photos, locally for offline use;
- when in the field, the farmer selects the task to perform;
- the application then guides them to the required location and helps them position the camera to take the photos and thus complete the task;
- later, when the device is online, the data is synchronized again, and the photos, along with any messages, are delivered to the PA;
- the information uploaded by the farmers is subsequently available in the Farmer Application (web application for the farmers to monitor TLS decisions for their agricultural parcels) and in the Expert Judgement application.
Application walk-through
Authentication and synchronization
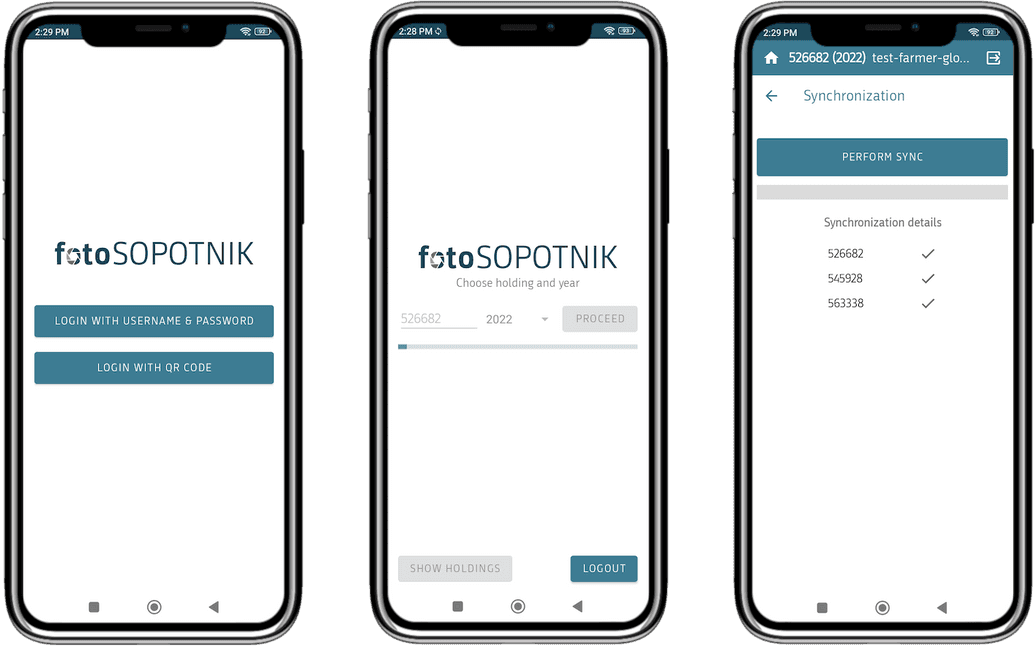
After successfully logging in, the user should select the appropriate scope (enter the holding id and application year) and afterwards, the synchronisation of the data can begin. When the synchronisation is complete, the user can use the application in the offline mode. One can have more than one scopes synchronised and the application can be used by multiple users on the same device allthough, the users cannot see each other's data and photos.
The application can use various authentication services.
The synchronization process takes into account all the associated data, i.e. orthophoto, agricultural parcels, tasks and photos. It can be done automatically or manually. Automatic synchronisation is triggered by specific events, e.g. at log in and log out, when the device gets connected to a known network and when the user has completed the task.
Application Layout
The layout of the application consists of three parts:
- Toolbar with buttons to log out, return to the home screen and information about the user and the selected scope.
- The navigation bar shows the user's current location in the application and navigation options.
- Main panel with the content.
Home screen
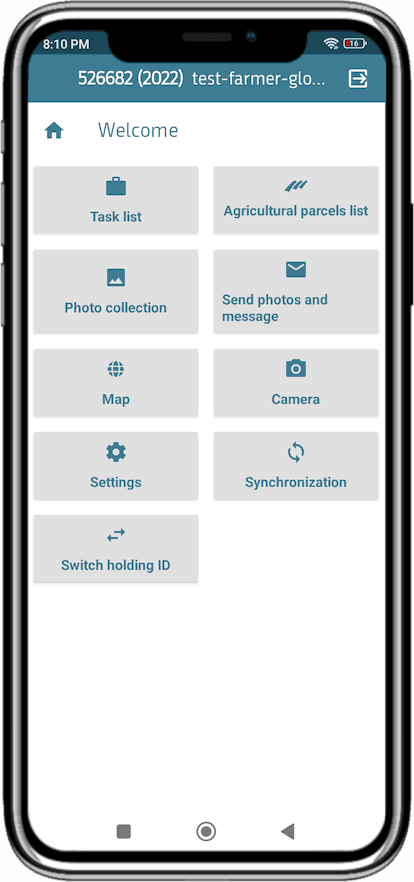
When the user opens the application and selects the scope, the home screen is displayed. It has several buttons that are used for in-app navigation. The user can return to the home screen at any time by clicking on the Home icon in the toolbar.
Task list - working with tasks
Tasks play an important role in sharing photos with PA. Photos can be attached to a specific task. Once a task is marked as completed, the photos are included in the synchronisation and sent to PA. The farmer can see them in the Farmer Application (web application for the farmers to monitor TLS decisions for their agricultural parcels), while PA can see them in Farmer Application and also in the Expert Judgement application. Tasks can be prepared in advance by PA in the Expert Judgement application or by the user in the Geotagged Photo Application using the Send photos and message function.
Task preparation by the PA
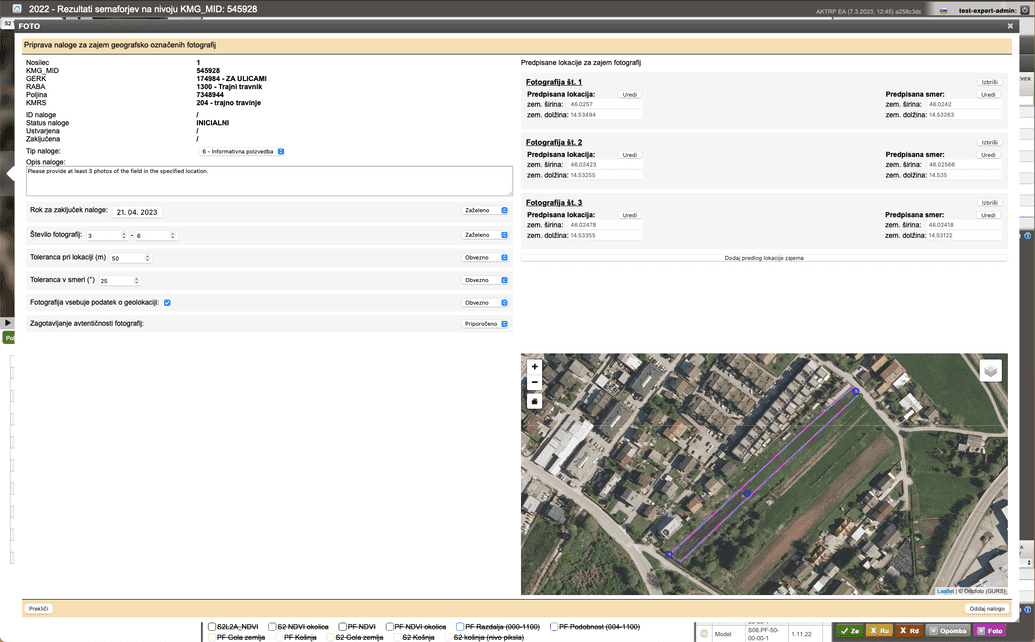
PA can prepare tasks in the Expert Judgement application by clicking on the Foto button in the bottom right corner of the application.
Click on the button opens the photo task preparation component, which contains basic information about the selected agricultural parcel the task is being prepared for. PA can select a predefined task type from the drop-down menu, add a short description of the task and set the parameters, such as due date, the minimum and maximum number of photos the farmer must provide, type of photos (geotagged or not, authentic or not) and offset tolerance for viewpoint location and camera direction. For each task, PA can specify several preferred viewpoint locations, depending on the required number of photos, and the preferred camera direction for each viewpoint.
Task list
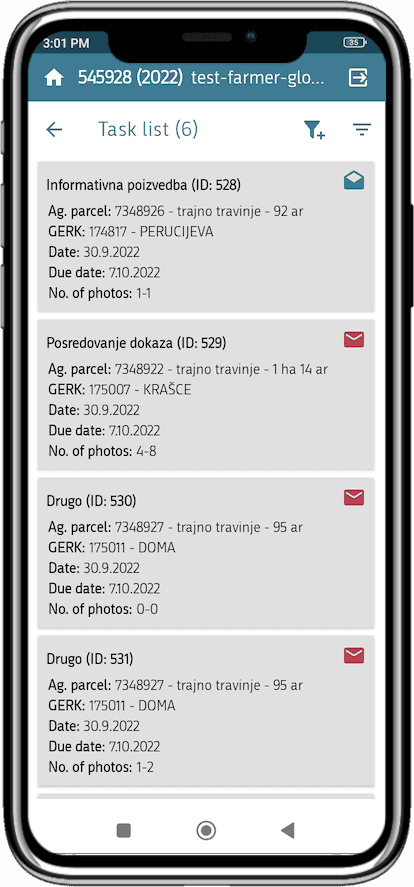
Touch on the Task List on the Home page opens the list of all tasks currently available on the device. Normally there will only be new or partially completed tasks as the completed tasks are synchronised with the servers as soon as the device gets connected to the preferred network (Wi-FI or, if allowed, a mobile data network).
By default, the list of tasks is sorted by status, with the new tasks at the top, but the user can also sort the list by any other task attribute. Only the basic task information is displayed in the list.
Task details
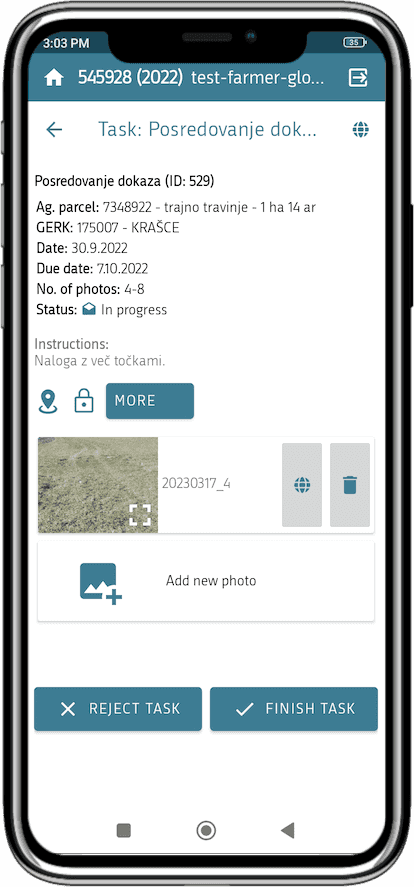
For more details about a specific task and further actions, the user should select the task from the tasks list. Available details are task type, information on the associated agricultural parcel, creation date, due date, minimum and maximum number of photos needed to complete the task, description of the task, and, if the user has already worked on a task, all photos already attached to it.
The user can also "Show task on map" or "Show more details about task parameters". In the task details, there are also buttons for adding photo to task, removing photo from task, rejecting task or finishing task.
Manage the task
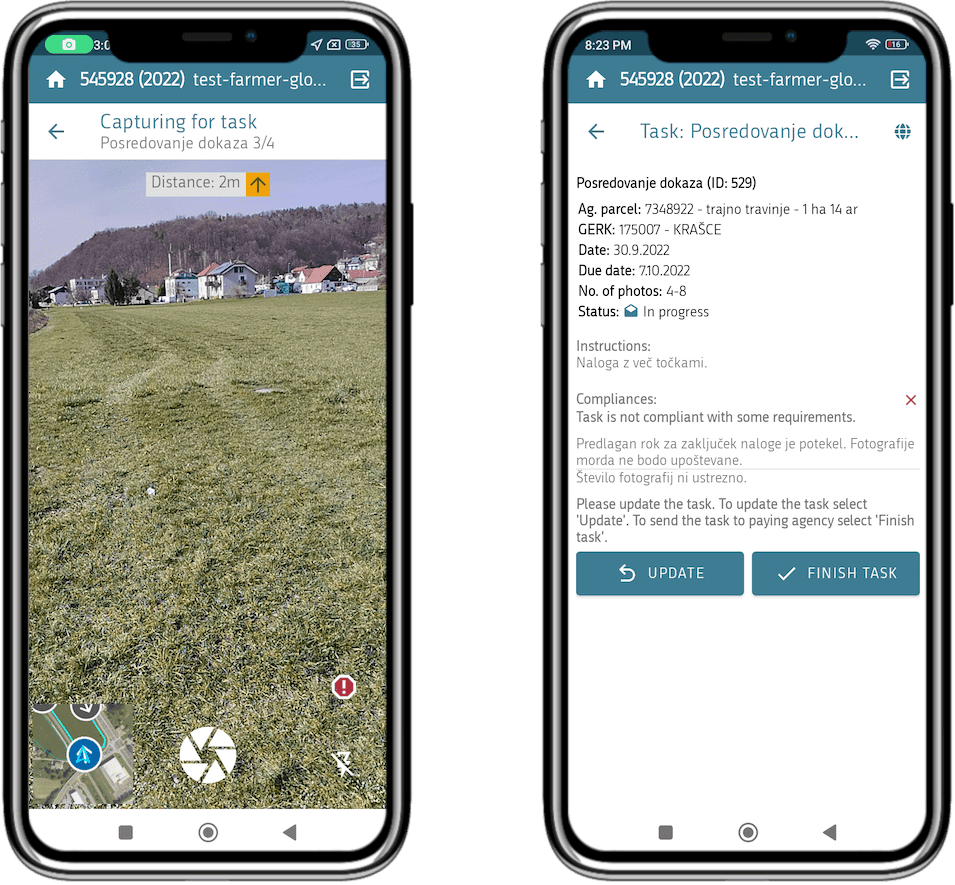
The core of executing a task is adding photos and, if necessary, additional descriptions (messages). The task type and the parameters set by PA determine the number of photos and information on whether the photos should be geotagged or not. The application can block the completion of the task if the preset requirements aren't met, or just notify the user about it. In both cases, the application can display the list of unfulfilled requirements or just generate a report.
The user can add photos to the task from their mobile phone gallery, the Photo collection if they have already taken some, or by taking new photos. If the user chooses the last option to take new photos and the locations of the photos have been specified by PA, the user should first select one of the given viewpoint locations and the application will help them navigate to the selected location. Once the user is at the correct location and the bearing (camera direction) is also determined, the application will help them turn to the exact angle. After that, the user has to frame the picture, press the shutter button and add a picture description (optional).
When all the photos are attached, the user can press the Finish task button and add a message to complete the work.
At each step, the user can decide to reject the task by pressing the Reject task button and adding the necessary explanation.
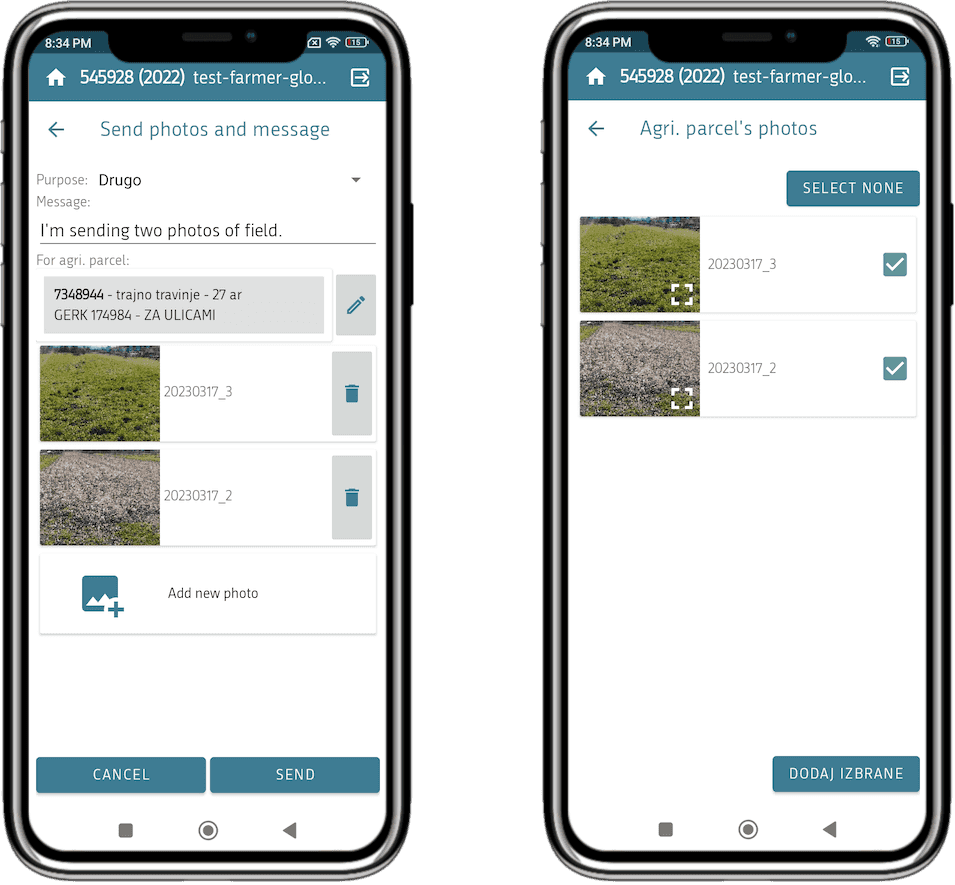
Send photos and message
The user can send photos and/or messages (by pressing Send button) even if PA hasn't prepared the task beforehand. With this function, the user creates a new task through which they send a photo or a message to PA.
Compared to the task prepared by PA, the user must additionally select the task type and the agricultural parcel the photos or messages are referring to. If the connection between the agricultural parcel and the photos has already been established, the user can simply select one or all photos of the selected agricultural parcel and attach them to this task.
Agricultural parcel list and agricultural parcel details
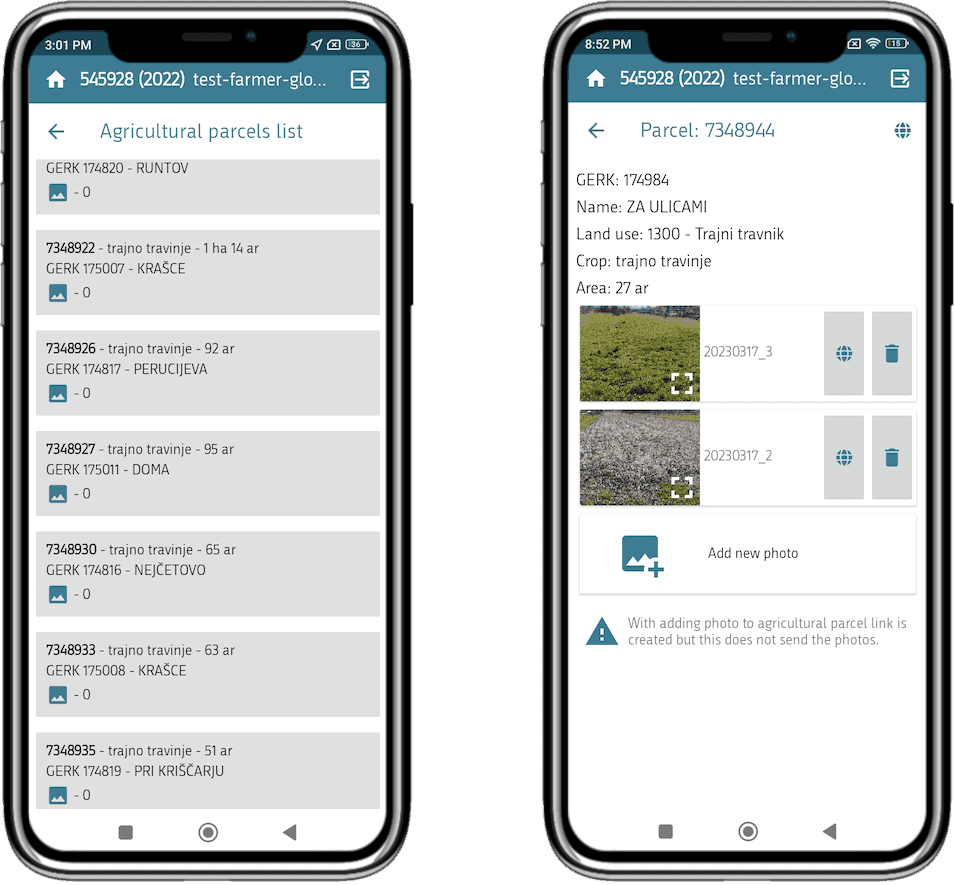
In the Agricultural parcels list, all parcels of the selected farm and their basic attributes are displayed. Similar to the tasks, the user can press the selected agricultural parcel to view its attributes and location on the map. One can attach a photo from the mobile phone gallery, from the Photo collection or take a new photo. The application can also navigate the user to the selected agricultural parcel. The attached photos can be used later when sending photos and messages.
Photo collection
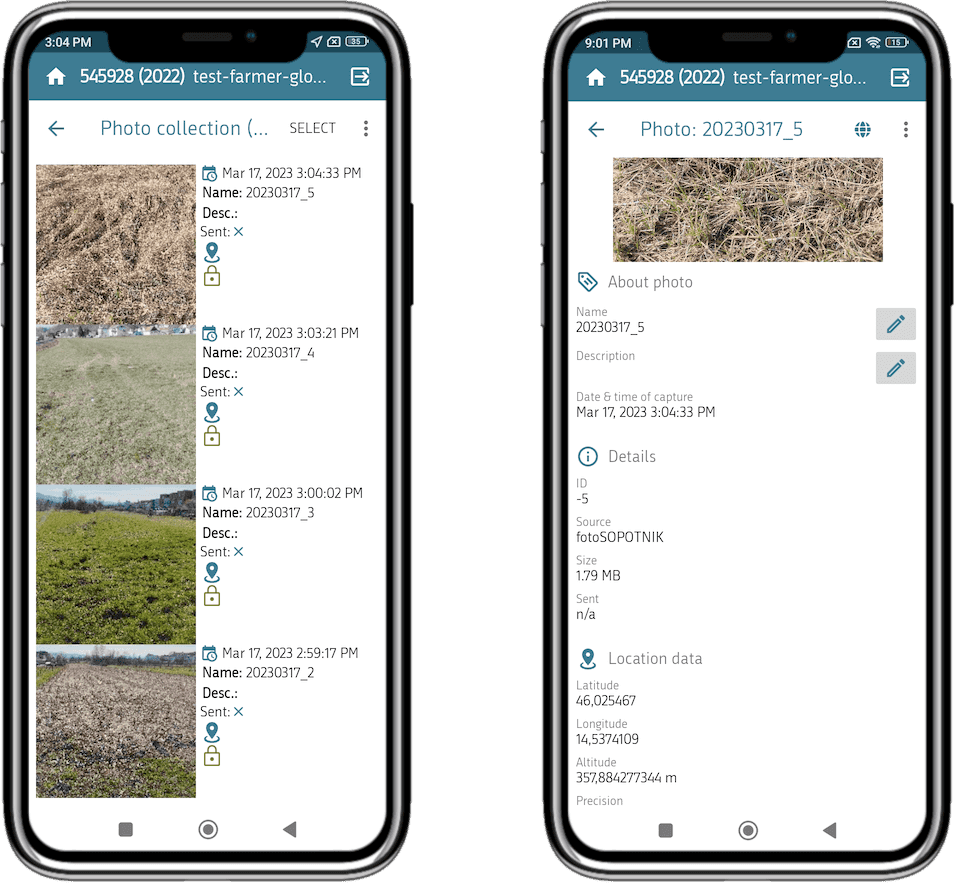
The Photo collection holds all photos taken with the in-app photo module as well as photos from other sources. Only the most important properties of the photos are displayed in the list of thumbnails. For more detailed information, including all sensor data, the user has to select and press on the photo. Two important properties are indicated with special icons: geotagged photos with a Globe icon and unmodified photos with a Lock icon.
For every photo stored in the Photo collection, we can detect a change of the photo itself or its attributes and tag this photo differently. To protect it from editing and other manipulations, it is by default saved only in the Photo collection. Of course, it si also possible to export and share it.
All photos from external sources attached to tasks or agricultural parcels are stored in the Photo collection as well. As the application isn't aware of the source of these photos and therefore cannot guarantee they haven't been manipulated, they are marked as non authentic images.
Map
The map shows all the data needed for the user to be aware of their location on the field and guide them to the predefined viewpoint for taking a photo. These data include the geometries of the farm's agricultural parcels, points representing the photo viewpoint locations required by the tasks, the locations of the geotagged photos stored in Photo collection, ortophotos, topographic maps,...
On the map, the user can move around the holding, see the current location, identify attributes of the displayed features and customize the view. The user can switch layers on and off, zoom in to different locations, select features, navigate to the selected features etc.
Camera
The built-in camera module is used on various occasions, e.g. when the user is working on a task, is taking a photo of the agricultural parcel, or is just taking a photo unrelated to a task or a parcel. When the user presses Camera on the home screen, the viewfinder appears to help framing the picture. The viewfinder comprises the live preview, mini-map, shutter release button, sensor status indicator and the button for setting the flashlight.
Other buttons on the home screen
In the Settings, the user can set and change the PIN for entering the application, set the warning limits and the compression level for photos, determine whether synchronisation should also take place via the mobile data network and log out.
Via the Synchronisation button, the user can view the current status of the synchronisation for all holdings they are authorised for and start synchronisation manually.
When the user presses the Switch holding ID button, they return to the Welcome screen for entering the application with a different scope.
